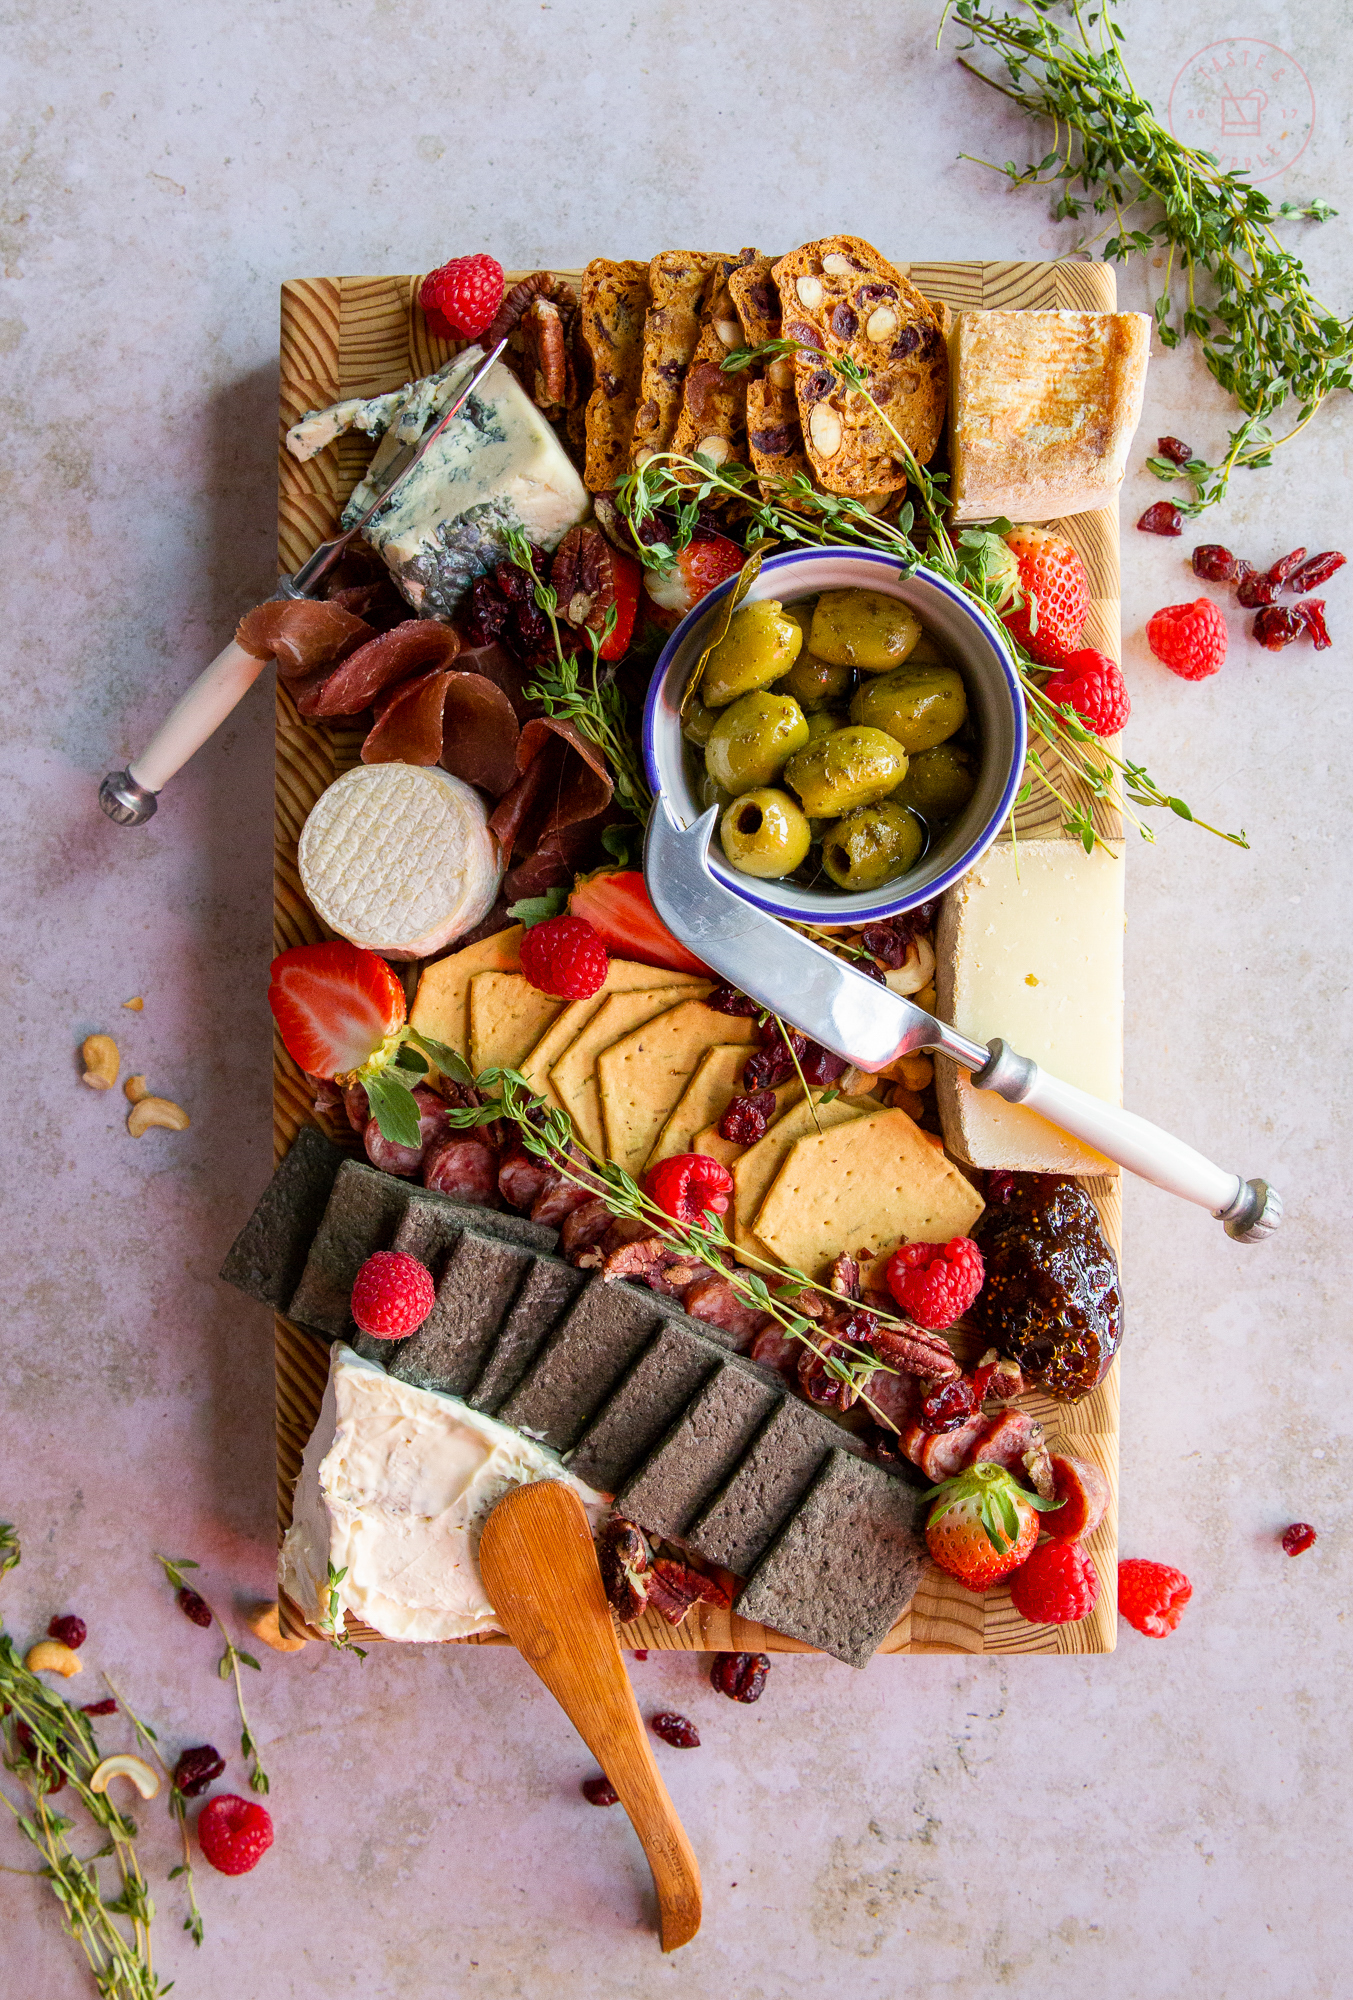
Does your charcuterie board look sad and emaciated? Do you want to know how to make it look lush, layered, and downright irresistible? I’m here to help. Below I’ve outlined my foolproof ten-step guide to elevate your next charcuterie board to edible art.
Disclosure: This post contains affiliate links. If you buy something through some of the links in this post, you won’t pay a penny more, but we’ll get a small commission, which helps keep the charcuterie board looking lush.
Size matters. Get outta here with your tiny cutting board. You need maximum surface area – opt for an oversized wooden or natural stone tray. Square, circular, or rectangular, all shapes are welcome, as long as they’re big.
I’ve used this beautiful larch wood end grain premium cutting board from Knifewear but have linked some other great options below.

Variety is the spice of life. Feature an assorted selection of cheeses – an aged, soft, firm, and a blue. Add a stinky cheese if you’re feeling adventurous. Head to your local cheesemonger for a guided walk-through – I picked up all the cheeses featured on this board from Ottawa shop, Jacobsons.
- Aged: Gruyere, Gouda, Aged Cheddar. I went with an aged Taleggio made with Water Buffalo’s Milk.
- Soft: Brie, Camembert, Goat. I opted for a creamy cow’s milk cheese with a ribbon of black truffle running through the centre – called Truffo. Since I love soft cheeses, I also picked up a soft Canadian goat’s milk cheese called Monsieur Emile.
- Firm: Manchego, Pecorino Romano, Edam. I went for a sheep’s milk cheese from Spain called Kamiku Fermier.
- Blue: Gorgonzola, Roquefort, Stilton. I picked out a mild double-cream French blue without the overwhelming sharpness that can often intimidate guests – the Saint Agur.
- Stinky: Epoisses, Morbier.
Space them out on your board and be sure to slice into or crumble each of the cheeses so guests aren’t scared to make the first move.
Here are some lovely cheese knives and the ever helpful cheese markers to clearly label your offerings (so guests don’t have to guess at what you’ve put in front of them).


Ham it up. Building out around your cheeses, artfully arrange loosely bundled slices of prosciutto, create a layered arc of salami, or a straight line of sliced cured sausage. Other great options include soppressata, chorizo, mortadella or a terrine. I’ve used bresaola and a cured sausage with blue cheese in it.
Carb load. Feature at least three different types of vessels for your cheese and charcuterie. Homemade or store-bought crostini are an easy crowd-pleaser. Play with texture with delicate buttermilk wafers or chewy date and hazelnut toasts.
On the board pictured here, I’ve used: charcoal squares, olive oil and rosemary crackers, and cherry almond toasts.
For the love of all that is holy, do NOT put your crackers in a separate basket – we are going for abundance here, by the time you’re done, your board should be completely hidden under an expertly composed array of colours, flavours, and textures.

Sweeten the deal. Enhance or balance the salty, spicy, creamy or umami flavours of your cheese and charcuterie with some fresh fruit – berries, figs, stone fruit, grapes or apples – or dried fruit like apricots, mango, or dates. Add in a pot of jelly or jam to smear on your crackers – a red pepper jelly, marmalade, fig preserves or quince jelly are all great options. Toss on a few shards of dark chocolate for good measure.
Salt bae. Bring the brine with a selection of olives, antipasto, roasted peppers or artichokes. Add a swipe of spicy mustard.
Go nuts. Enhance the textural play with some toothsome roasted, salted cashews, almonds, pecans, or walnuts.

I dip, you dip, we dip. Maybe your partner is playing at healthy living, throw on some hummus, muhammara (roasted red pepper & walnut dip – I love the version from Fairouz, available for takeout/delivery), or artichoke dip for good measure.
Finish strong. At this point, your board should be completely covered with decadence. Don’t miss out on an opportunity to be totally extra by arranging a few sprigs of fresh herbs, edible flowers, or other seasonal touch.
Pics or it didn’t happen. Snap a shot of your charcuterie masterpiece and share it on Instagram tagging @tasteandtipple for expert appraisal or kudos.
For more great tips on building a beautiful charcuterie/cheese board, check out one or more of these great books dedicated to the subject:


